How to use the Media Library
The T4 Media Library is home to media items such as images and documents which you can add to your web page content.
Before you add an item to the Media Library you should:
- follow our image size guide when preparing images for T4
- understand how to describe images for accessibility and findability
- use our image editing guide and templates to create images that are optimised for the web
Using the media library
We create a Media Library folder (category) to help you organise your Media Items. You will have access to the Media Library folder for your site(s).
To find your Media Library folder go to the top left of the T4 screen and click the Content drop down menu. Select Media Library.
This opens the Media Library screen. On the left of the screen is the library folder structure and on the right is the table, which contains all media.
Click the plus symbol to the left of the ‘Categorised’ folder. You should see your website folder in the structure. Expand your site folder. This folder will contain sub-categories to store your ‘Files’ and ‘Images’.
Media items
Click on a sub-folder to see your media items. Media items appear in a table to the right of the screen.
To increase the number of items listed use the records dropdown options on the top right of the table.
To search through items in the selected Category enter text in the 'Filter' field on the top right of the table.
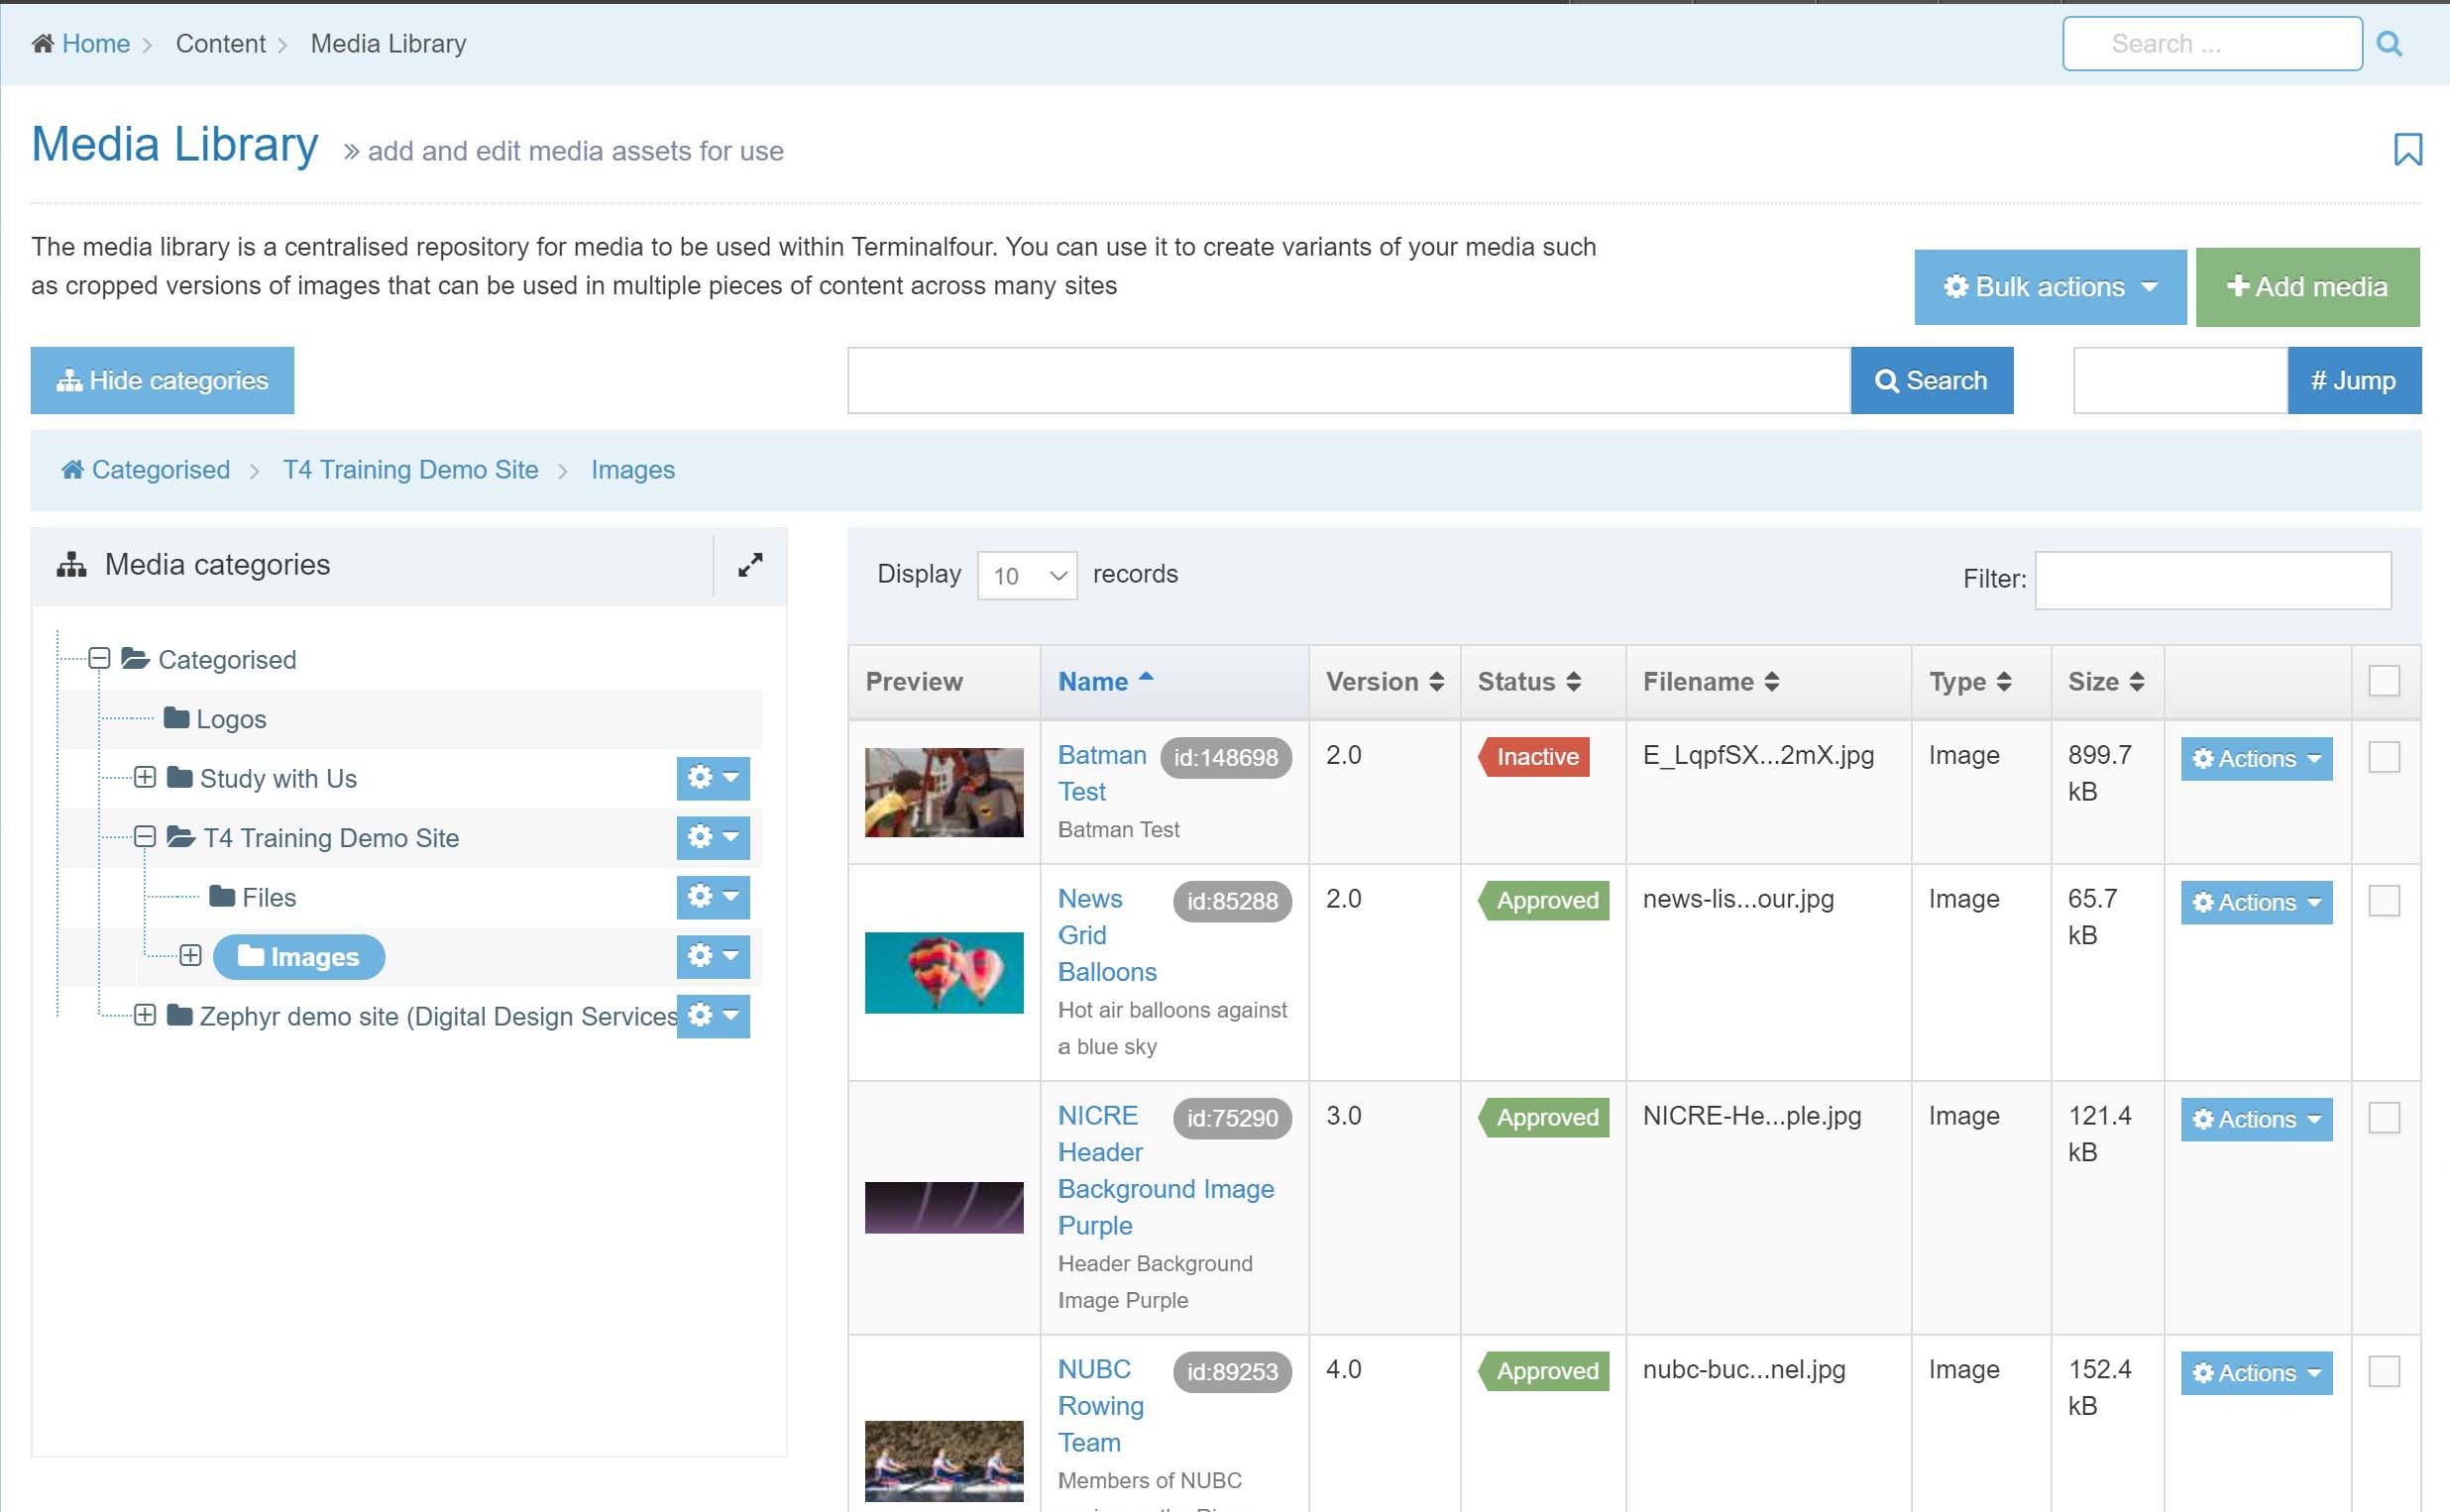
Media Library Controls
The Media Library controls let you add, move, delete and retrieve media items.
Search: to find Media Items, enter the Media Item name or the keywords associated with it in the Search box and click Search.
Jump: each Media Item has a unique ID number associated with it. If you have the ID for the Media Item, enter it into the Jump box and select Jump.
Bulk actions: delete or move multiple files to a different Category. You must select two or more items' checkboxes (on the right side of the table) to use the Bulk actions.
Add Media: Create new media within the currently selected Category.
Media Categories: use the drop-down menu next to a folder to Create, Edit or Delete Category.