Map From Memory
Map From Memory
Creating a map from memory is a fun, engaging activity which encourages students to look closely at images and memorise their key features.
As the name suggests, this activity works really well with maps, but can also be used with a wide variety of images.
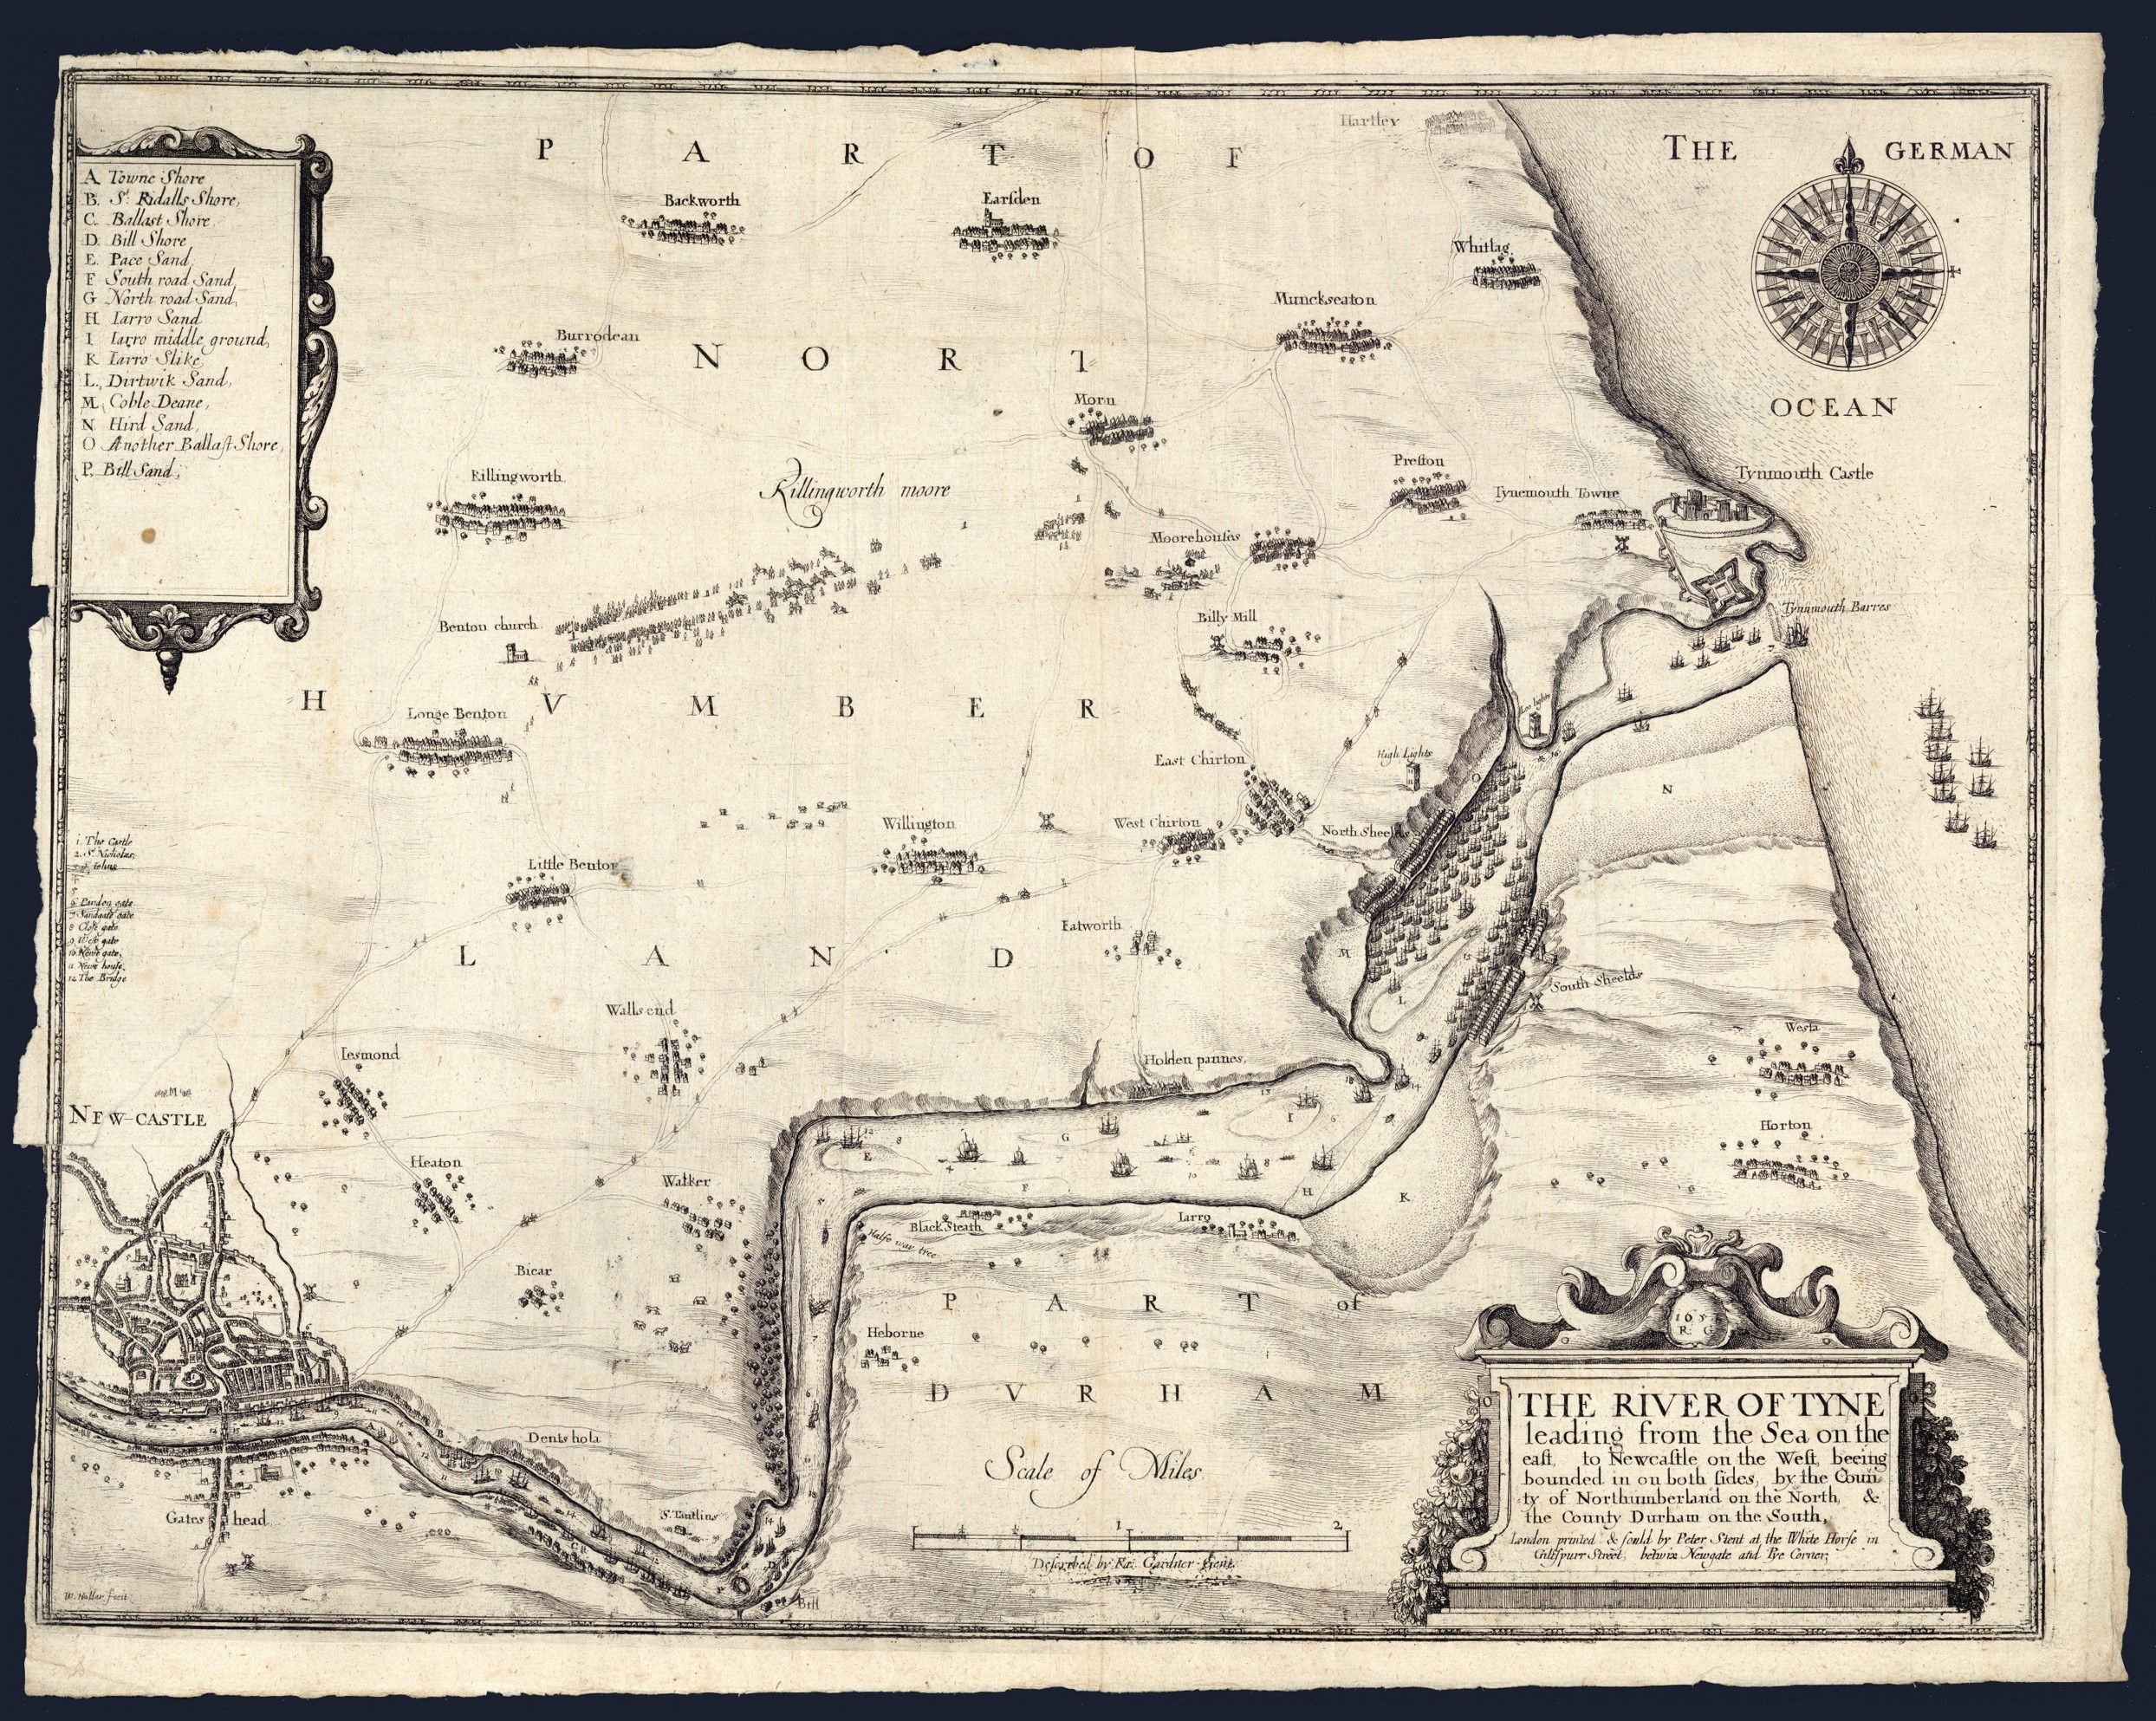
Image reference: Clarke 1830, Newcastle University Special Collections
Have a go at this activity by following the steps outlined below.
- Select a suitable image. This needs to be an image that you need or want your students to study carefully and to remember. It is important that your chosen image is not too basic or simple - it needs to have enough detail in it that the students won’t be able to memorise it from just one quick look. (For example, you could use this map from Newcastle University Special Collections).
- Print out the image onto a sheet of paper (minimum A4 size) and put it on a desk at the front of the classroom.
- Divide your students into groups (approximately 5 people per group works well) and give each group a blank sheet of paper and a pencil.
- Get your students to decide who is going to be in charge of drawing and get the others to number themselves 1-4.
- Explain that the aim of the activity is for each group to recreate the image at the front of the classroom as accurately as possible and that the person in charge of drawing will remain at the desk and the other students will take it in turns to come up to the front of the classroom, look at the image for 30 seconds, return to their group and tell the person who is drawing what they must draw and where. Stress that only the person who is in charge of drawing is allowed to draw on the paper.
- Run the activity: Start by calling up all the number 1s and giving them 30 seconds to look at the image, then telling them to return to their group and giving them 1 minute to communicate what they have seen to the person who is drawing. Repeat with the number 2s, 3s and 4s. When everyone has had a chance to see the image once, give the students the opportunity to discuss their strategy going forward (e.g. looking for certain features, looking at certain sections) and then call up each number again, at least 3 more times.
- At the end of the activity show the students the image (you could just hold up the one they’ve been coming out to the front of the room to look at or, better still, display a large version on the whiteboard). Get the students to compare their drawing to the original image. How accurate is their recreation of it? Have they missed any key features?
- You could give a prize to the group who has created the most accurate reproduction (Letting them know there will be a prize at the start can introduce a healthy competitive element to the activity) and it’s also worth debriefing which strategies each group employed and which ones worked best.
- Now that the students are familiar with the image, you can discuss its key features and get them to ask questions about it.
You might find it useful to print out the Map From Memory instruction sheet to use with a picture or map of your choice.
Did you know?
We used this seventeenth century map of the river Tyne in our 'Story of the Civil War in the North East' project.
You can find out more by visiting our projects page.